
This guide offers comprehensive instructions on safely and effectively cutting a steerer tube. Correctly shortening the steerer tube enhances aesthetics and improves bike handling. This process requires careful measurements‚ appropriate tools‚ and precise execution. Remember‚ accuracy is paramount‚ as cutting mistakes are irreversible;
Why Cut a Steerer Tube?
Cutting a steerer tube is a common practice in bike maintenance and customization‚ primarily done to achieve a better fit and improve the overall aesthetics of your bicycle. New forks often come with excessively long steerer tubes‚ allowing for adjustability across various frame sizes and rider preferences. However‚ an uncut steerer tube can lead to an uncomfortably high handlebar position and an ungainly appearance.
One of the main reasons to cut a steerer tube is to fine-tune your riding posture. By removing excess steerer tube length‚ you can lower your handlebars‚ achieving a more aerodynamic or aggressive riding position‚ which is particularly beneficial for road cycling or racing. Conversely‚ for a more upright and comfortable ride‚ some riders might prefer a slightly higher handlebar position‚ but even then‚ excessive steerer tube length is unnecessary.
Aesthetically‚ a shorter steerer tube can significantly clean up the front end of your bike‚ creating a sleeker and more professional look. Too many spacers beneath the stem can detract from the bike’s overall appearance. Furthermore‚ reducing the amount of exposed steerer tube can also save weight‚ albeit marginally‚ contributing to a lighter and more responsive bike.
However‚ it’s crucial to remember that cutting a steerer tube is an irreversible process. Therefore‚ careful planning and accurate measurements are essential before making any cuts. Always err on the side of caution‚ leaving a little extra length if unsure‚ as you can always remove more later‚ but you can never add it back.
Tools and Materials Needed
Successfully cutting a steerer tube requires a specific set of tools and materials to ensure a clean‚ precise‚ and safe cut. The essential items include a high-quality hacksaw with a fine-toothed blade‚ ideally one designed for cutting metal or carbon fiber‚ depending on the steerer tube material. A cutting guide‚ such as the Park Tool SG-6 or similar‚ is crucial for maintaining a straight and accurate cut‚ preventing any angled or uneven edges.
In addition to cutting tools‚ you’ll need measuring tools like a precision ruler or caliper to accurately mark the desired cut line on the steerer tube. A permanent marker is useful for clearly marking the cut line. For carbon fiber steerer tubes‚ it’s recommended to use a specialized carbon cutting blade to minimize splintering and damage to the composite material.
Safety gear is paramount‚ so wear safety glasses to protect your eyes from flying debris and gloves to protect your hands. Once the cut is made‚ a file or deburring tool is necessary to smooth and chamfer the cut edge‚ removing any sharp burrs that could damage the headset bearings or pose a safety hazard. Sandpaper with varying grits can also be used for fine-tuning the edge.
Finally‚ you’ll need a star nut setting tool to properly install the star nut into the steerer tube‚ providing a secure anchor for the top cap bolt. For carbon steerer tubes‚ consider using an expanding compression plug instead of a star nut to avoid damaging the carbon fiber.

Preparing the Fork and Steerer Tube
Before commencing the cutting process‚ proper preparation of the fork and steerer tube is essential for achieving accurate results and preventing potential damage. Begin by removing the fork from the bike frame‚ carefully setting aside any headset spacers‚ the stem‚ and the top cap. Thoroughly clean the steerer tube to remove any dirt‚ grease‚ or debris that could interfere with accurate marking and cutting.
Next‚ reassemble the fork with the headset spacers and stem in the desired configuration. This step is crucial for determining the correct amount of steerer tube to be cut off. Ensure that the stem is properly aligned and tightened to the manufacturer’s specifications. It’s advisable to leave a few millimeters of steerer tube above the stem to allow for future adjustments or the use of different stem heights.
Once the desired stack height is determined‚ carefully inspect the steerer tube for any existing damage‚ such as cracks or deformations. If any damage is found‚ the fork should not be used and should be replaced immediately. For carbon fiber steerer tubes‚ pay close attention to any signs of delamination or fraying.
With the fork properly prepared‚ proceed to the next step of marking the steerer tube for cutting. Ensure that the fork is securely held in place during the marking process to prevent any movement that could lead to inaccurate measurements.
Marking the Steerer Tube for Cutting
Accurate marking is paramount to a successful steerer tube cut. Begin by reassembling the fork‚ stem‚ and spacers in their intended configuration on the bike. This simulates the final setup and accounts for stack height preferences. Ensure the stem is properly aligned and tightened to specification; this step is crucial for precise marking.
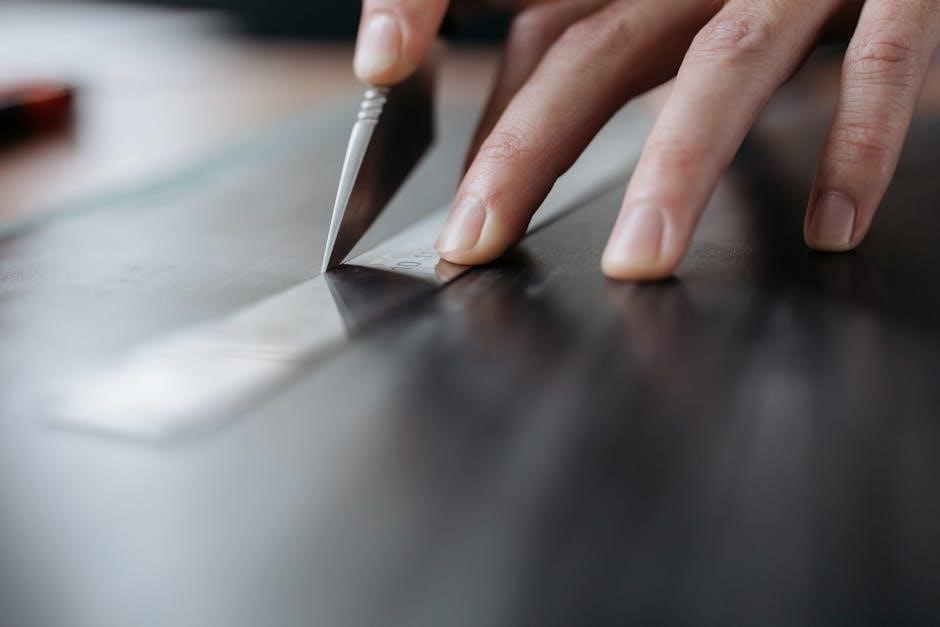
With everything in place‚ use a sharp tool‚ such as a fine-tipped marker or a razor blade‚ to create a distinct line on the steerer tube‚ flush with the top of the stem. This mark indicates the precise point where the steerer tube needs to be cut. Double-check the alignment and position before committing to the mark.
For added precision‚ consider using a specialized steerer tube marking tool. These tools provide a consistent and accurate reference point‚ minimizing the risk of errors. If you are working with a carbon fiber steerer‚ it is essential to use a marking tool that will not damage the delicate fibers. A simple pocket knife or screwdriver can be used to carefully scratch a line.
Remove the fork from the bike and carefully inspect the marked line. Ensure it is clean‚ straight‚ and free of any smudges or inconsistencies. This mark will serve as your guide during the cutting process. Proceed to the next step only when you are completely satisfied with the accuracy of the marking.
Using a Cutting Guide
A cutting guide is indispensable for achieving a clean‚ square cut on a steerer tube. These guides provide a stable and precise platform for your saw‚ significantly reducing the risk of angled or uneven cuts. Begin by selecting a cutting guide that is compatible with the diameter of your steerer tube. Most guides are adjustable to accommodate various steerer tube sizes.
Securely clamp the cutting guide onto the steerer tube‚ aligning the marked cut line with the designated slot in the guide. Ensure the guide is firmly in place to prevent any movement during the cutting process. A loose or improperly aligned guide can lead to inaccurate cuts and potentially damage the steerer tube.
Before you start cutting‚ double-check the alignment of the cutting guide and the marked line. Make any necessary adjustments to ensure they are perfectly aligned. Once you are satisfied with the alignment‚ proceed to insert your saw blade into the cutting slot of the guide.
Maintain a steady and consistent sawing motion‚ applying gentle pressure to the blade. Allow the cutting guide to direct the blade‚ preventing any side-to-side movement. Rotate the steerer tube in the guide after you get 2/3 of the way through the cut. This technique ensures a clean and even cut all the way around the tube. Patience and precision are key to achieving a professional-quality cut.
Cutting with a Hacksaw

Using a hacksaw to cut a steerer tube requires precision and control. A high-quality hacksaw with a fine-toothed blade is essential for achieving a clean‚ straight cut. The blade should be designed for cutting metal or carbon fiber‚ depending on the material of your steerer tube. Before you begin‚ ensure the steerer tube is securely clamped in a cutting guide to maintain stability.
Position the hacksaw blade in the cutting slot of the guide‚ aligning it with the marked cut line. Apply gentle‚ even pressure as you begin sawing‚ using long‚ smooth strokes. Avoid forcing the blade‚ as this can cause it to skip or bind‚ resulting in an uneven cut. Let the blade do the work‚ maintaining a steady rhythm throughout the process.
As you approach the end of the cut‚ reduce the pressure slightly to prevent the blade from catching or splintering the edge of the steerer tube. Continue sawing until the tube is completely severed‚ taking care to maintain a consistent cutting angle. Once the cut is complete‚ carefully remove the steerer tube from the cutting guide.
Inspect the cut edge for any burrs or imperfections. Use a file to smooth any rough edges and ensure the cut is perfectly square. A clean‚ precise cut is crucial for proper headset installation and optimal bike performance.
Cutting Carbon Fiber Steerer Tubes
Cutting carbon fiber steerer tubes demands extra caution due to the material’s unique properties. Unlike metal‚ carbon fiber can splinter or delaminate if not cut properly. A specialized carbon fiber cutting blade is crucial. These blades have finer teeth and are designed to minimize damage to the carbon fibers. Always wear a dust mask and eye protection to avoid inhaling carbon fiber particles.
Secure the steerer tube in a cutting guide specifically designed for carbon fiber. This provides stability and prevents the tube from flexing during the cut. Use slow‚ deliberate strokes with the hacksaw‚ applying minimal pressure. Let the blade do the work‚ avoiding any excessive force that could cause splintering.
Maintain a consistent cutting angle and avoid stopping or changing direction mid-cut. Rotate the steerer tube in the guide after you get 2/3 of the way through the cut. As you near the completion of the cut‚ reduce pressure even further to prevent any final-stage splintering. Once the cut is complete‚ carefully remove the steerer tube from the cutting guide.
Inspect the cut edge for any frayed fibers or imperfections. Use fine-grit sandpaper to gently smooth the edge and remove any loose material. Apply a thin layer of epoxy resin to seal the cut edge and prevent future delamination. A clean‚ well-sealed cut is essential for maintaining the structural integrity of the carbon fiber steerer tube.

Filing and Finishing the Cut Edge
After cutting the steerer tube‚ filing and finishing the cut edge are crucial steps to ensure safety and prevent damage to headset components. The goal is to create a smooth‚ even surface free of burrs or sharp edges. These imperfections can interfere with proper headset seating and potentially cause premature wear or even failure. A smooth edge also reduces the risk of injury during handling.
Begin by using a flat file to remove any large burrs or unevenness from the cut edge. Hold the file at a slight angle and use smooth‚ consistent strokes‚ working around the entire circumference of the tube. Apply gentle pressure and avoid excessive filing‚ which could remove too much material.
Once the major imperfections are removed‚ switch to a finer file or emery cloth to further refine the edge. Continue to work around the circumference‚ ensuring a smooth and consistent finish. Pay particular attention to the inside edge of the steerer tube‚ as any burrs here could damage the star nut or compression plug during installation.
Finally‚ use a deburring tool or a small piece of sandpaper to chamfer the inside and outside edges of the steerer tube. This creates a slight bevel that helps to prevent sharp edges from cutting or damaging seals and o-rings. Clean the steerer tube thoroughly to remove any filings or debris before proceeding with the next step.
Installing the Star Nut
After you’ve cut and finished the steerer tube‚ installing the star nut is the next critical step. The star nut provides a secure anchor point for the top cap bolt‚ which is essential for preloading the headset bearings. Proper installation ensures the headset functions smoothly and prevents play‚ contributing to safe and precise steering.
Before you begin‚ ensure the steerer tube is clean and free of any debris. Position the star nut insertion tool squarely on top of the steerer tube. This tool guides the star nut into the tube straight and evenly. Gently tap the tool with a hammer‚ driving the star nut into the steerer tube.
It’s crucial to maintain alignment during this process to prevent damaging the steerer tube or misaligning the star nut. Continue tapping until the star nut is seated at the correct depth‚ typically around 15-20mm below the top of the steerer tube. Most star nut insertion tools have a built-in stop to indicate the proper depth.
Once the star nut is fully seated‚ remove the insertion tool and inspect the installation. The star nut should be straight and securely anchored in the steerer tube. If it appears crooked or loose‚ remove it and repeat the installation process with a new star nut. Never attempt to reuse a star nut that has been improperly installed‚ as it may be damaged and unable to provide a secure anchor.
Reassembling and Testing
With the star nut securely installed‚ the final stage involves reassembling the fork‚ stem‚ spacers‚ and headset‚ followed by thorough testing to ensure everything functions correctly. Begin by carefully sliding the fork back into the head tube‚ ensuring the headset bearings are properly seated. Add any necessary spacers above the stem to achieve the desired handlebar height and stem position.
Next‚ install the stem over the steerer tube‚ aligning it with the front wheel. Tighten the stem bolts to the manufacturer’s specified torque‚ alternating between bolts to ensure even pressure. Once the stem is secure‚ install the top cap and bolt. Gradually tighten the top cap bolt until the headset play is eliminated‚ but the steering remains smooth. Avoid overtightening‚ as this can damage the bearings.
After adjusting the headset‚ double-check that the stem bolts are still tightened to the correct torque. Spin the front wheel to verify that it rotates freely without any binding or resistance. Finally‚ test the steering by gently rocking the bike back and forth. There should be no play or knocking in the headset. If any issues are detected‚ re-examine each step of the reassembly process and make any necessary adjustments.